What’s the connection between JavaScript and home automation? And why would anyone be interested in custom HA if there’s a ton of ready to use solutions that you can just download and install?
I decided to start the project for a simple reason. I like tinkering. One day, I decided to create such an automation myself, for fun, using a Raspberry Pi and programming it in JavaScript, which I work in on a daily basis. Here’s what I did and how, just in case you’re a tinkerer too and want to try something similar. Or see how JavaScript can be used in a non-standard way.
I used JavaScript to fight my irrational fears
After leaving home, I often catch myself wondering if I really closed the garage gate. I KIND OF remember that I did, but did I? The thought itself is nagging and unpleasant, and doesn’t leave you until you get back home. In 99% of the cases, I did close the gate, but still—this wasn’t enough to put me at ease.
The solution to my problem was a device that would inform me about the status of the gate – if it’s closed or not – sending this information to my smartphone. And also allowing me to close the gate if I indeed forgot to do it, or open it when my neighbour wants to borrow a hammer.
Here’s what I used.
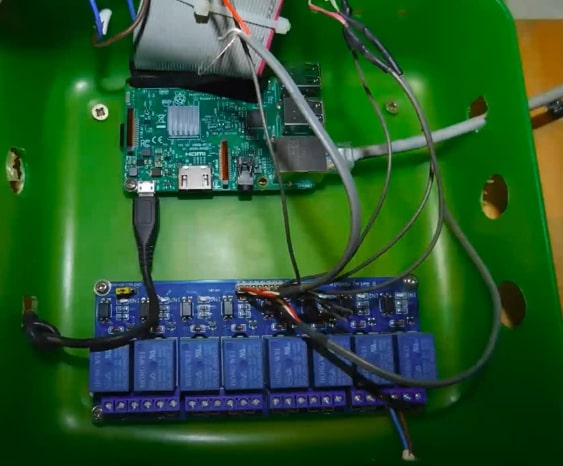
Hardware
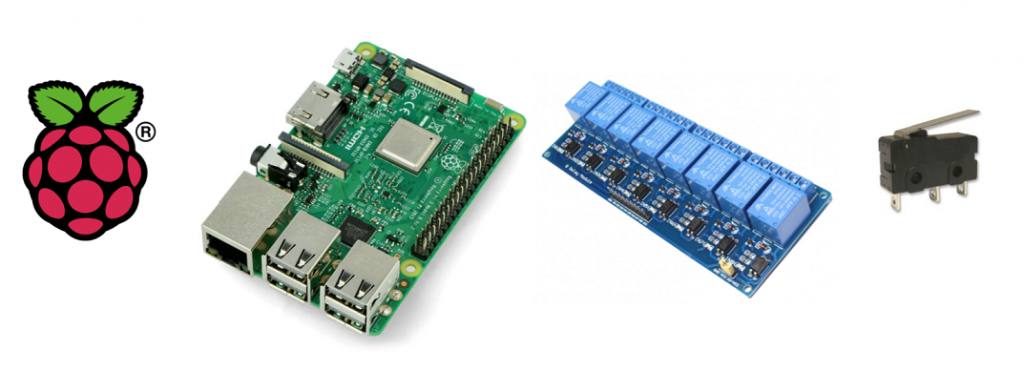
These are, starting from the left-hand side:
– Raspberry Pi (a small single-board computer that can be used either as a computer or a driver for the automation),
– a relay board to extend the Pi’s capabilities (making it possible to activate a device too powerful for the Pi alone),
– a micro-switch to check the position of the gate (installed on the gate’s rack, on its both ends, detecting the position of the gate when it’s fully open or closed).
Here’s my 3B version of the Raspberry Pi
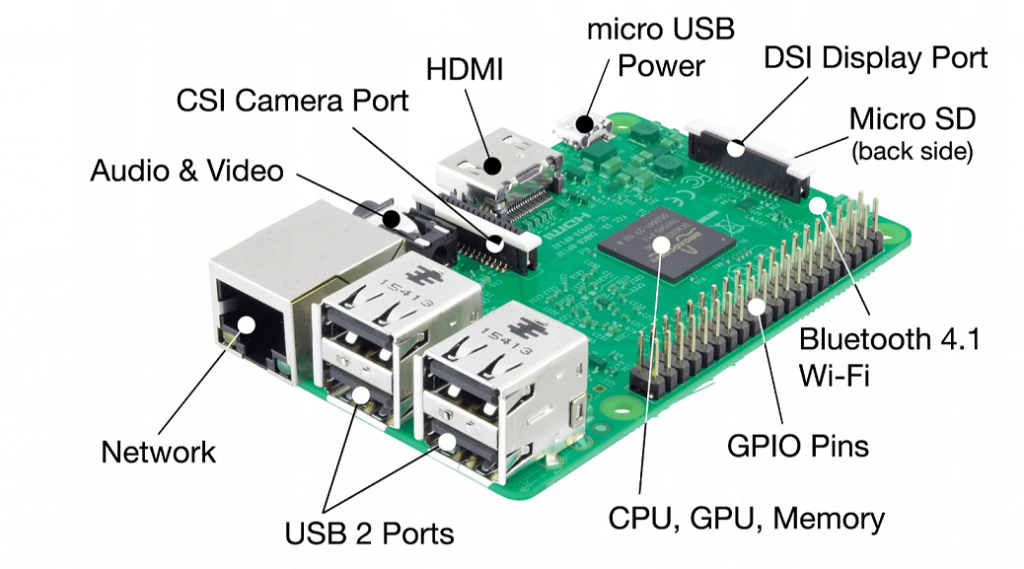
Newer, more powerful models are already available and can be used as home multimedia centers.
You can notice standard I/O sockets like in any computer. There’s an HDMI output, audio output, web connection socket, but there’s also Bluetooth, USB 2.0, a microSD port… And by the way, the OS is installed on an SD card. In my case, it was Linux Raspbian.
After launching the system and connecting the device to a monitor, you have a fully functional computer that you can use to surf the web and whatnot.
The final key element for the project is a GPIO (General Purpose Input/Output) connector to control the gate.
Let’s take a closer look at the GPIO Connector
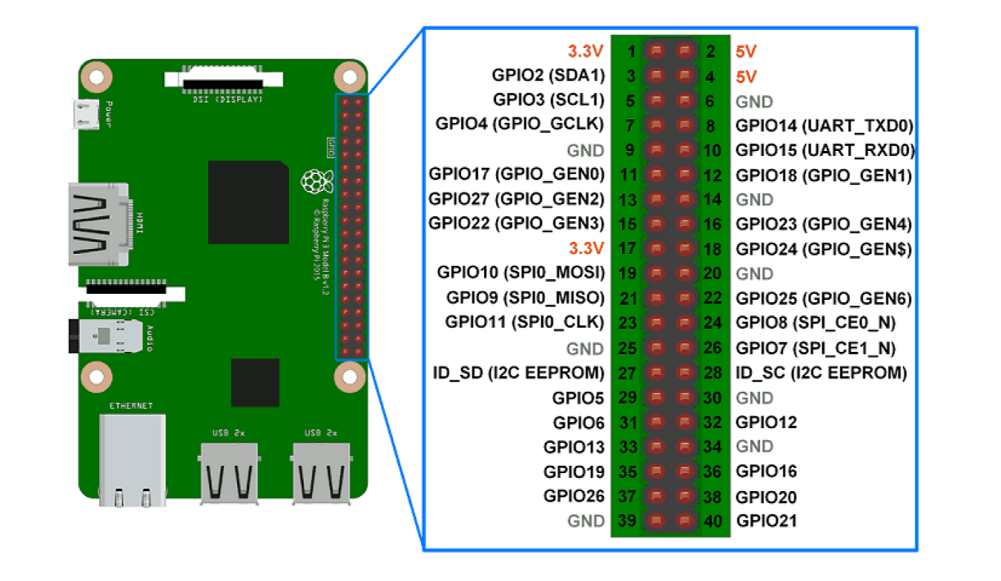
You can see which pins do what. Not all of them are for the controls. There are voltage pins that you can use to connect the limit switches or mass pins. You can even use the 5V pins to power your Raspberry Pi via the GPIO, to avoid using the micro USB power supply. However, be careful with these 5V pins. You can fry the board if you connect a 5V with another control pin.
Anyway, I only used the simple pins configured to do what I needed.
Software
Back-end

Let’s start with the backend app. It’s written in Node.js, although I used Typescript, which is a JavaScript extension that makes programming and debugging easier by making the code more transparent. This app runs on the Pi, on Raspbian, from an SD card.
The app handles two things:
1. GPIO
2. Rest interface for communicating with the front-end
You can see it in the listed libraries. Typescript is the foundation. RPI-GPIO provides a class to control the GPIO on the Pi. There’s also Express to create REST API, and Google-auth-library to verify the token via Google sign-up and a user whitelist for security purposes. Finally, there’s Express-sse to create an event stream endpoint for one-way communication from back-end to front-end.
One more thing about security. Change the default SSH port and set up a private key login or you’ll get raided by bots eventually.
Front-end
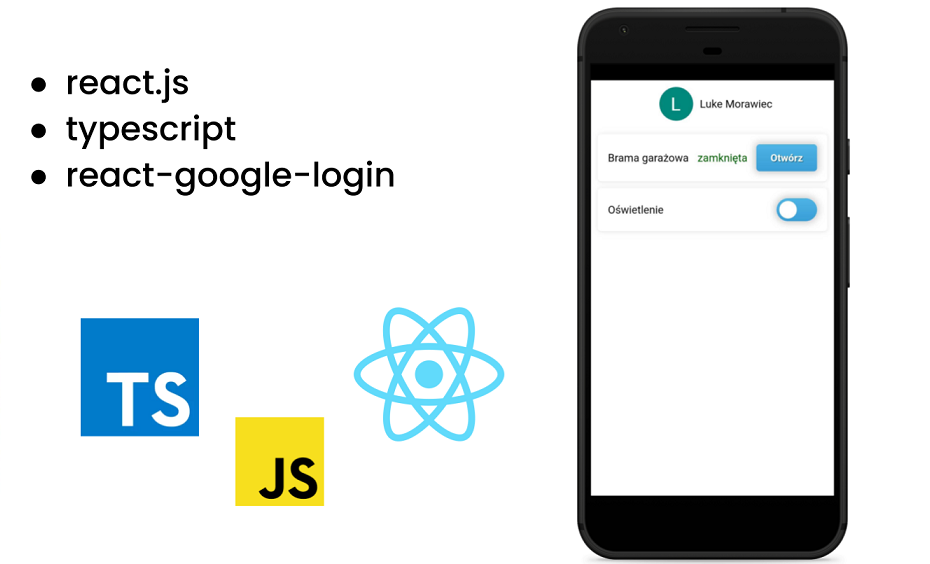
Here’s a screenshot from the app. It’s written in React.js, also using Typescript—for the same reasons as in the back-end. There’s also the react-google-login library to create the 'Sign up via Google’ button, get a token and use the API safely.
This is a PWA app that can 'pretend’ to be a mobile app. It has a desktop shortcut and can be used in a browser on any device with one (read more about PWA). It’s available in real-time from any part of the world, making my garage gate as global as it can get.
You can see the Open / Close the gate button, and I want to add light control in the future. Also to make it possible to leave the light on for 2 minutes after opening the gate—so I don’t have to leave the car to turn it on. Another future feature will be notifications about the gate being opened from another device, making it as safe as Fort Knox.
How it’s all connected
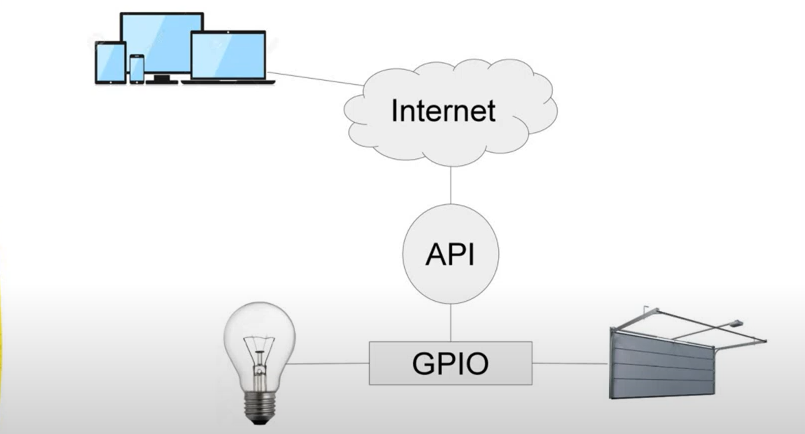
The top part is devices such as a tablet, a smartphone, or a PC, with an internet connection. Also, the API, meaning our Raspberry Pi, is online.
When you want to control the gate online, you connect with the API via the app, and then it uses the right GPIO pin and sends the 'open the gate’ signal. Limit switches on the gate’s rim send a feedback signal that the gate is moving or open (or closed). It works the same way for the lights.
Code examples
GPIO input

One unusual thing is the functions that control the physical device. Let’s talk about controlling GPIO inputs. In the first lines of the code you can see that I set all the inputs (gpio.DIR_IN), configure them, and this allows me to use the input listener function to wait and monitor for any changes in the signal. This would launch a callback that performs some kind of logic.
The second function, inputValue, checks the state on a specific pin without waiting for a change but whenever I make the query.
GPIO output

This is actually really simple. There’s a function to receive the pin number and the state it should have on the selected output. Using the ’write’ method, which is a JS Promise, it saves the state to the pin.
Take a look at how it works!
Here’s a short FAQ that should answer some questions you may have:
How about an emergency stop?
It is possible to include an emergency off switch in the controller. I’d advise using also curtain controllers to avoid crushing a careless user.
How does the gate opening via the Raspberry Pi work?
As you can see in this picture, one of the pins is connected to the relay board. When shorted, this relay drives the existing driver for the gate. The pin gets a high state, switches on the relay, and the relay launches the gate driver.
How does the signal travel from the relay to the gate’s engine?
There is no direct control over the engine. The gate controller has a pin that I connect to via the Raspberry Pi. When you buy an automatic gate, you have the controller in the package, with the antenna, remotes and everything.
Was it difficult to adjust the control signal?
Nope. There were 2 pins that I had to connect, that’s all.
Would it be possible to use a doorbell button to open the gate?
Yes!
So the software works by getting requests via Node.js, and then sends a true/false signal to GPIO pins, and that’s all the software does? How do the pins make the light go on?
That’s basically it. There’s also authentication and user authorization. The pin itself won’t power a bulb or anything. I use the relay board for that. The GPIO pin switches on the relay, which turns on the circuit for powering the lights.
When I connect with my home via LTE, is it a public IP or VPN?
I use hosting for websites, web apps etc. On this hosting, there’s a front-end app that you can connect with from any place in the world. The Raspberry uses a public IP, but with a custom port instead of a default one.
How long did it take to create the software alone?
You could probably do it within a single day. There’s a lot of useful information and libraries on the internet.
And how much did it cost?
- 220 PLN for the Raspberry Pi 3B (around $60)
- 40 PLN for the relay board (around $10)
- 2 PLN for a single limit switch (around $0,55 per each)
Is there anything else you could use Raspberry Pi for?
Sure, a whole lot of stuff. It’s great for drones, printers, robots, retro consoles (and not only retro!), home automation, monitoring… Imagination is the limit.
My point here was to show that the popular home automation solutions don’t have to cost you much—if you know something about JavaScript. For those willing to get their hands a little dirty, the Pi can be an inexpensive and powerful home automation solution.


